
Didn’t want to spend loads of money on tiles for the bathroom, the kitchen and hall. Didn’t want vinyl or lino. Didn’t want carpet, or laminate. I’m a fussy old bird.
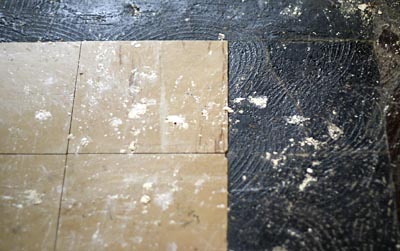
The current hall floor is vile. Old, brittle vinyl tiles in brown and dirty cream, some of them missing or cracked, and the surface underneath is that black bitumen stuff that apparently contains asbestos. Some of them have the remains of carpet glue that is impossible to get off. Look at these pictures and despair:

Solution: home made tiles! Ding ding ding!
First things first – remove all those ghastly vinyl tiles, hoover and seal the underlying surface with a waterproof polyurethane.
Then I shall use carpet tape to lay the tiles, so that if any scuff up in the future they will be fairly easy to replace.
Enter the beautiful hand made cardboard tiles painted in beautiful colours or a pattern or whatever comes to mind. I have a few pattern ideas mapped out on graph paper, having measured the hall down to the 1/4″ – gotta have those tiles fit like a dream!
Once all the tiles are down I shall seal the floor with three or four coats of polyurethane. Given the length of time some of them take to dry I might be having to put a plank down between the bedroom and the bathroom. Either that or a pulley system with a bucket. I must investigate drying times!
So, here’s what I have ready:
Blunt chisel and hammer to get the old tiles up
Sealant once I’ve cleared all the tiles, hoovered and then washed the floor.
Double-sided carpet tape.
For the tiles:
Thick cardboard (not the corrugated type or it will squash)
Paper to paint and cover large areas of cardboard
Adhesive to fix paper to cardboard
Cutter mat and craft knife – carefully measure the tiles out and cut.
Clear polyurethane (matt or shiny – whatever)
Large paintbrush
That’s the plan. I shall keep you updated with progress. 🙂

October 8th, 2015 at 1:49
Hi Cathy! Thanks for dropping by 🙂
I’m still experimenting! Plus have been a bit lazy in the DIY department. But old boardgame boards sounds like a GREAT idea. I like it!
I’m going to be taking up all the old vinyl tiles so that I’ve got as even a surface as possible. What I’ve discovered so far is that as long as the carpet tape is wide enough it stops the corners from curling up, plus once it’s all sealed that will stop any rogue tiles. Am also experimenting with trying tiles with some sealant between them and some without, as I like the idea of a grout-like appearance.
Also, am experimenting with designs printed on to thin rice paper so that they can be stuck on with water-based adhesive like flour paste and then sealed with the top layer of poly. Decisions decisions. Too much choice. Ha!
LikeLike
October 8th, 2015 at 0:31
Hi Sooz, how is it going with the cardboard tiles? I am thinking of using old boardgame boards to tile my sitting room floor, and would be interested to know how your project went, durability-wise. I am wondering about curling corners, uneven surface, un-sticking from floor, etc. Can’t be worse than what I’ve got now (similar to yours but also with some weird sort of fibre floor covering that has gaping holes in it).
Cathy
PS my own cheapskate exploits can also be experienced vicariously on a couple of my Facebook pages (Permaculture House in Totnes and Get It Here!) and occasionally my blog and website http://www.permaculturehouseintotnes.co.uk.
LikeLiked by 1 person